- This topic has 0 replies, 1 voice, and was last updated 5 years, 10 months ago by
 CLOC-Admin.
- Topic
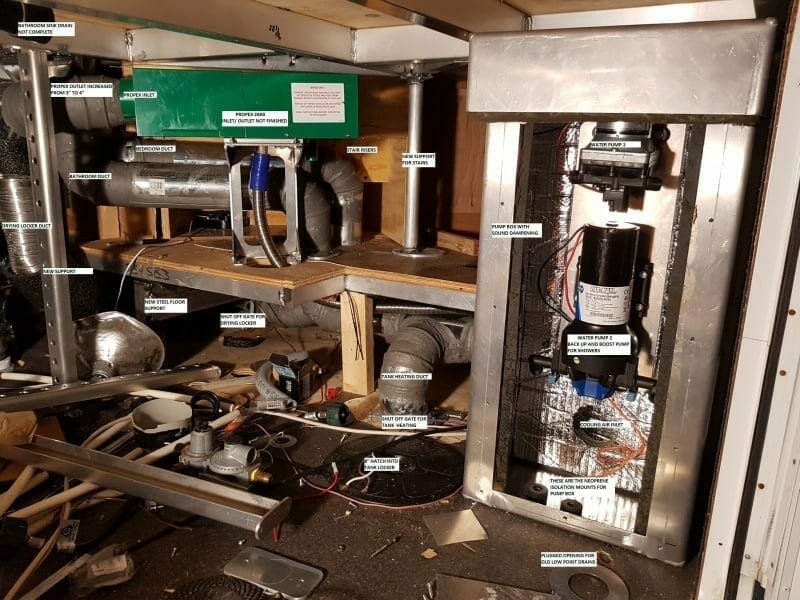
- CLOC-AdminThis it taken inside the front pass through looking back. Left side is the entry step.
Starting on the left
– 1 1/2″ ABS drain for the kitchen sink comes up from the back, a vents runs forward then T’s into the drain for the shower/washing machine. These where moved 12″ further away from the door to allow room for the drying locker.
– 3″ ABS above that is the heating duct for the boot glove dying locker(see below)
– To improve air flow the heating ducts are now 4″-6″ galv steel with sealing mastic to prevent (warm) air loss. Warm air is directed away from the heater so only cool air enters the heater.
– The 2″ fitting in the top of the tank is for the grey tank flush nozzle
– New steel beam to support the floor. Square holes are to remove some weight…..don’t know why I did that.
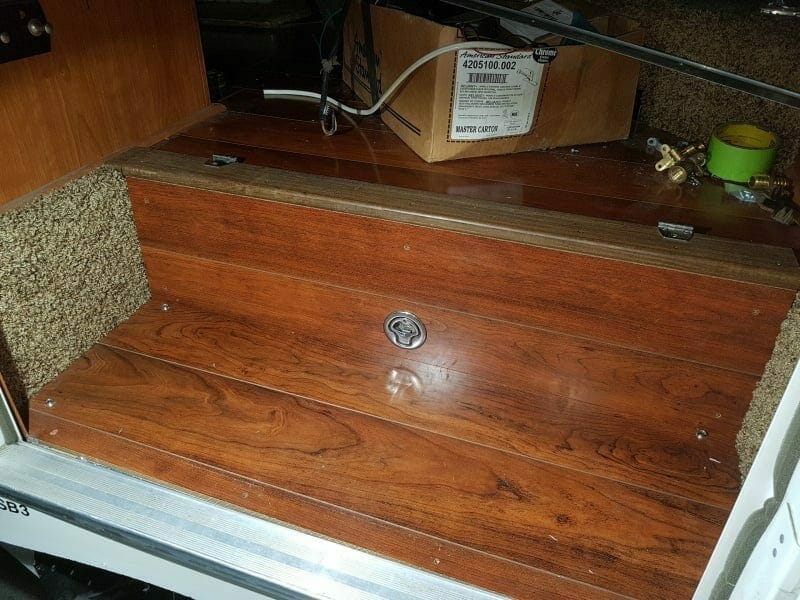
Boot/glove drying locker under the entry step. Will be vented outside. The bottom is an aluminum pan that will capture any water. The ABS plugs come out to allow hoses that can be pushed into gloves or boots. Hinge door is not show.
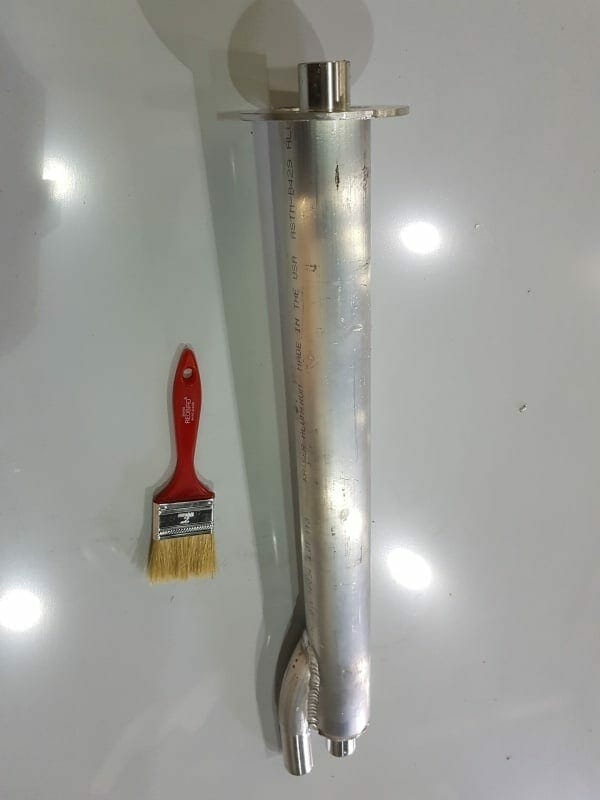
Today I’m making the concentric vent for the Propex heater.
Spent more time than I ever wanted to in the front pass through. It is pulled apart and I know if I don’t do it now I never will.
Lots of customization making systems redundant and keep everything serviceable.
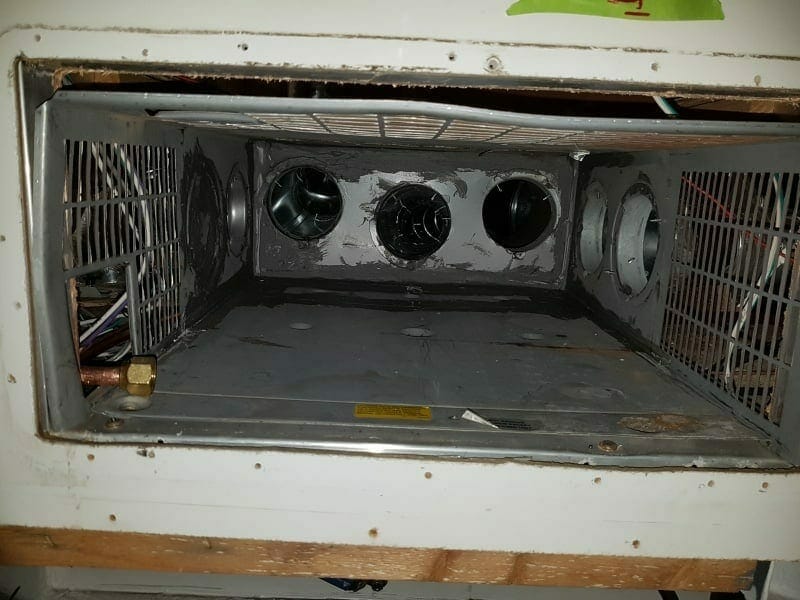
Posted: 11:35 AM – Dec 23, 2017The knock outs on both the top and bottom of our furnace had broken loose which allows warm air to recirculate into the cold air intake. I welded the knock out because that was easy/fast but in hind site I may have been better to screwed a piece of metal on. The furnace box was then seal with duct seal.Posted: 11:46 AM – Dec 23, 2017Added a 15″H x 24″W compartment door to out 34SB3. Area below the fridge is dead space.Fitting at the lower left is the concentric vent for the Propex heater that was custom made…
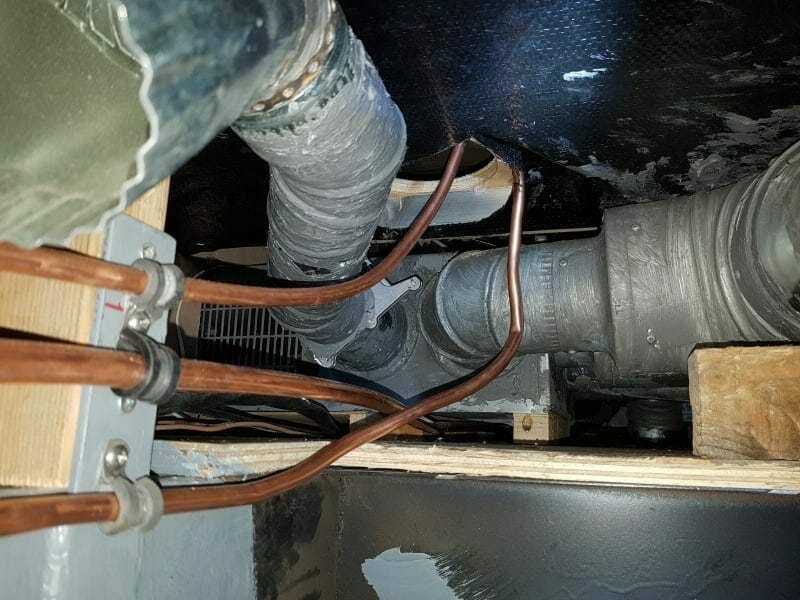
Posted: 10:04 PM – Jan 01, 2018The drying lockerPosted: 11:26 PM – Jan 09, 2018This picture below is looking forward from about front axle position on the left side. The plywood continues forward to the the front pass through.-Galv steel ducting. 3″duct on the left side is to heat the FW tank (120gal) valves. The knife valve in the background can be used to close the duct off so heat isn’t wasted when temps are above 30F. The 6″ hole allows access to the from inside the trailer through the return air grill that (now) has hinges on it.
-4″ – 6″ gal duct on the right side runs to the back of the trailer. There are 3 of these
-Copper lines with cushion clamps.
– Top 3/8″ -New Propex 2800 heater
– Middle 1/2″ – Sububan furnace. This run is +/-25′ so 1/2″ was used to supply enough gas to the furnace
– Bottom 3/8″ -Fridge…..it has a small kink… arg! Who would think the fridge would be the most difficult to run.
The steel flat bar that the clamps are screwed to was added along with the wood 2×4 to increase the support of the floor (aluminum) joistsOriginally there was just one support at the middle of the furnace…the one along the back edge is new.
If you look closely there is a new piece of 1/8 plywood under the furnace in the middle. This is to insulate (50amp shore power) the wires from the furnace.
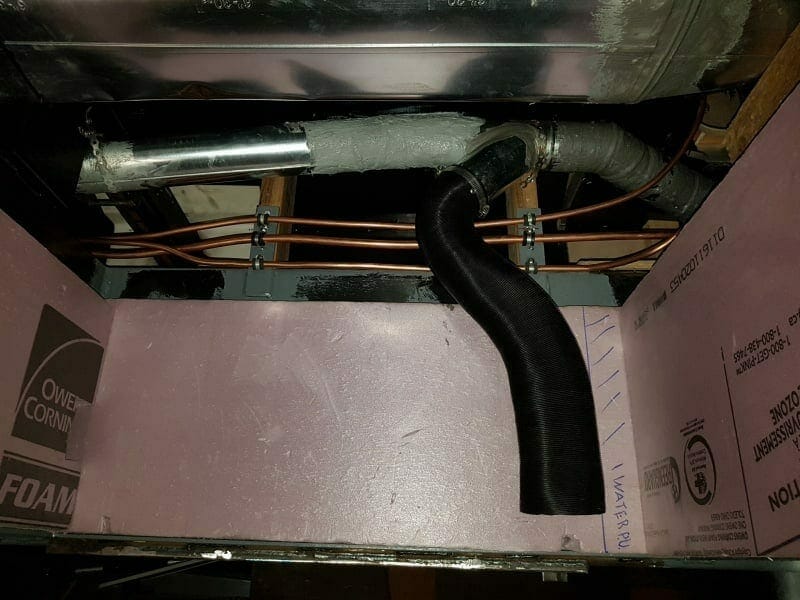
The camera is turned 90 degree facing the (left) outside. These are the same copper line as above.
3″ black duct directs heat at the pick up for FW tank (120gal) #1 and a FW dump valve
2″ XPS (R10) around the tank
3″ x 8″ oval duct at the top of the image. Oval duct was need to clear the top of the tank.
This is same FW Tank #1 compartment with the camera turned 180 degrees facing the right side of the trailer.
– At the left is the (white plastic) drying locker
– Four 1″ blue conduit are for – trailer lights -120VAC power -spare – don’t know why I added the fourth?
– The round hole at the center is the old furnace duct that was blowing warm air into the furnace intake grill
– New wood supports for the floor joists
– Across the middle is the 1 1/2″ ABS kitchen sink drain and the hot (insulated) / cold water lines.
– 3rd 3″ x 8″ furnace duct at the topB.W.Gentry
Owner/Admin
2007 Carri-Lite XTRM5
Breckenridge, TX


- You must be logged in to reply to this topic.